

The Canon AE-1 is a groundbreaking 35mm SLR film camera released in 1976, known for its innovative microprocessor technology and versatility for both professionals and hobbyists.
Overview and History of the Canon AE-1

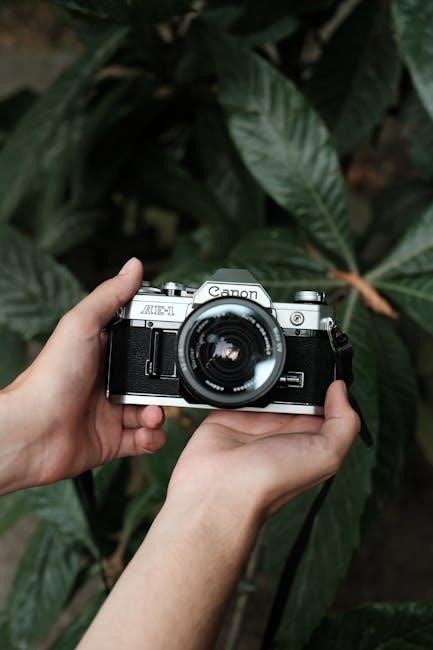
The Canon AE-1, released in 1976, is a landmark 35mm SLR film camera that revolutionized photography with its advanced features and affordability. Part of the AE series introduced in 1976, it became a favorite among amateur and professional photographers alike. Known for its durability and intuitive design, the AE-1 was one of the first cameras to incorporate microprocessor technology, enabling precise exposure control. Its robust construction, combined with a wide range of interchangeable FD lenses, made it a versatile tool for various photographic needs. The AE-1’s popularity endured long after its release, solidifying its place in photographic history as a timeless classic.
Purpose and Target Audience of the Instruction Manual
The Canon AE-1 Instruction Manual is designed to guide users in mastering the camera’s features, ensuring optimal performance. It targets both novice photographers seeking to understand basic operations and experienced users looking to explore advanced functionalities. The manual provides step-by-step instructions for loading film, setting exposure modes, and maintaining the camera. Its clear, concise language and structured layout make it accessible to a broad audience, from hobbyists to professionals. By following the manual, users can unlock the full potential of the AE-1, enhancing their photographic skills and creativity. It serves as an essential resource for anyone aiming to achieve exceptional results with this iconic camera.
Camera Components and Accessories
The Canon AE-1 features a robust camera body, viewfinder, interchangeable lenses, shutter button, film advance lever, and battery compartment. Accessories include the power winder, neck strap, and lens cap.
Naming the Parts ─ Top View
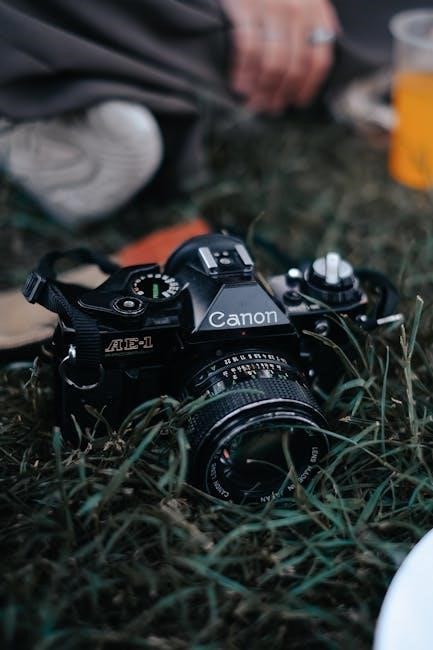
The top view of the Canon AE-1 reveals essential controls for operation. The shutter button is located on the right, used for capturing images. Next to it is the film advance lever, which moves the film to the next frame. The ASA dial on the left sets the film speed, ensuring proper exposure. A small LED display above the shutter button shows the selected aperture in manual mode. The mode dial allows switching between automatic and manual modes. The lens mount is visible, enabling easy interchange of FD-series lenses. These components are designed for intuitive and efficient photography.
Naming the Parts ─ Bottom View
The bottom of the Canon AE-1 features the battery compartment, housing the 4LR44 or 4SR44 batteries essential for the camera’s metering system. The tripod socket is centrally located for secure mounting on tripods, ensuring stability during shots. A small film counter window allows users to check the film’s exposure number. The date back compartment is optional, enabling date imprinting on photographs. These components are strategically placed for easy access and functionality, enhancing the camera’s usability without compromising its sleek design.
Camera Body with Automatic Winder
The Canon AE-1 with an automatic winder streamlines the shooting process by enabling seamless film advancement. This accessory allows photographers to shoot up to 2 frames per second, making it ideal for capturing dynamic or fast-moving subjects. The winder significantly reduces the need for manual film advancement, minimizing camera shake and saving time. It is particularly useful for action and sports photography. When paired with the Motor Drive MA, the camera can achieve up to 4 frames per second, enhancing productivity for professional and enthusiast photographers alike. This feature underscores the AE-1’s versatility in various shooting scenarios.
Film Loading and Preparation
Properly loading and preparing film is essential for optimal performance. Ensure the film is aligned correctly and avoid exposure to light during the process for best results.
Inserting the Film
To insert the film, open the camera back by pulling the rewind knob. Align the film leader with the red mark on the spool. Secure the film to the spool and advance it until the perforations align with the red index mark. Close the camera back and ensure the film is properly seated. Wind the film gently to prevent tearing. Always handle the film in low-light conditions to avoid exposure; Follow these steps carefully to ensure proper loading and avoid any issues during shooting.
Setting the ASA Film Speed
To set the ASA film speed on your Canon AE-1, locate the ASA dial on the top view of the camera. Lift and turn the dial to align the desired ASA rating with the white index mark. Ensure the dial clicks into place to confirm the setting. The ASA setting determines the camera’s sensitivity to light, so it’s crucial to match it with the film speed specified on your film roll. Properly setting the ASA ensures accurate exposure readings and optimal photo quality. Always refer to the film packaging for the correct ASA rating before adjusting the dial.
Advancing the Film
After loading the film, advance it by turning the film advance lever clockwise until it stops. This ensures the film is properly seated and ready for exposure. You’ll hear a distinct clicking sound as the film advances. Turn the lever until it reaches its stop position, then release it. The frame counter will move to “1” to indicate the first frame is ready for exposure. Always advance the film before taking each shot to ensure the next frame is positioned correctly. If the lever doesn’t return to its original position, the film may not be advancing properly, and the shutter won’t fire.
Exposure Modes and Settings
The Canon AE-1 offers automatic exposure modes, including programmed AE, shutter-speed priority AE, and AE flash. Manual override is also available for custom settings, providing flexibility for photographers.
Automatic Exposure Modes
The Canon AE-1 features three automatic exposure (AE) modes: programmed AE, shutter-speed priority AE, and AE flash. Programmed AE automatically selects both aperture and shutter speed for optimal results. Shutter-speed priority AE allows users to set the shutter speed, while the camera adjusts the aperture. AE flash mode ensures proper exposure when using a flash unit. These modes make the camera user-friendly, catering to both beginners and advanced photographers. The automatic settings provide convenience while maintaining high-quality image outcomes, making the AE-1 a versatile tool for various shooting conditions and lighting scenarios.
Manual Override and Custom Settings
The Canon AE-1 allows for manual override, enabling photographers to take full creative control. Users can adjust aperture and shutter speed independently, bypassing automatic settings. This feature is ideal for experienced photographers who prefer precise control over their shots. Custom settings can be fine-tuned to suit specific lighting conditions or artistic preferences. The manual mode provides flexibility, making the AE-1 adaptable to various photographic styles and techniques. This capability ensures that photographers can achieve their desired visual outcomes, whether in a studio or outdoor setting, by tailoring the camera’s settings to their unique vision and expertise.
Using the Power Winder
The Canon AE-1 Power Winder is an optional accessory designed to enhance shooting convenience. It enables automatic film advancing, allowing photographers to take multiple shots without manually winding the film lever. This feature is particularly useful for rapid shooting sequences or extended photo sessions. The Power Winder is easy to attach and operates seamlessly with the camera’s mechanisms. It maintains the AE-1’s portability while providing a more streamlined workflow. With the Power Winder, users can focus on composition and capture moments effortlessly, making it an ideal tool for both amateur and professional photographers seeking efficiency and comfort in their workflow.
Maintenance and Troubleshooting
Regularly clean the camera body and viewfinder to ensure optimal performance. Check battery levels and replace as needed. Lubricate moving parts periodically for smooth operation.
Cleaning and Maintenance Tips
Regular cleaning is essential to maintain the Canon AE-1’s performance. Use a soft, dry cloth to wipe the camera body and lens. For the viewfinder, gently remove dust with a microfiber cloth or compressed air. Avoid using liquids or harsh chemicals, as they may damage the camera’s finish or internal components. Check the battery compartment for corrosion and clean it with a cotton swab if necessary. Lubricate moving parts like the film advance lever periodically to ensure smooth operation. Store the camera in a cool, dry place to prevent moisture damage and extend its lifespan.
Common Issues and Solutions
The Canon AE-1 may experience issues like a non-functioning shutter release button, often due to battery depletion or corrosion. Replace the batteries or clean the contacts with a cotton swab. If the film advance lever is stuck, ensure the film is properly loaded or consult a professional. For inaccurate exposures, check the ASA setting and ensure the lens is clean. If the camera’s microprocessor malfunctions, try resetting it by removing and reinserting the batteries. Regular maintenance, such as cleaning and lubricating moving parts, can prevent many of these issues. Always refer to the manual for troubleshooting guidelines.
Replacing the Shutter Release Button
To replace the shutter release button on your Canon AE-1, start by removing the battery and ensuring the camera is powered off. Use a small screwdriver to gently pry off the top cover or access the button assembly. Disconnect the electrical contacts connected to the old button and carefully remove it. Install the new button, ensuring it is securely fastened and properly aligned. Reconnect the electrical contacts and reassemble the camera. Test the shutter release to ensure it functions correctly. If unsure, consult a professional or refer to the manual for detailed instructions to avoid damaging the camera.