3D Crystal Puzzles offer a captivating challenge, blending artistry and intellect! University Games and BePuzzled are leading brands, providing delightful, intricate puzzles for enthusiasts of all ages․
These puzzles demand patience and spatial reasoning, resulting in a stunning, translucent display piece once completed – a rewarding experience for puzzle lovers!
What are 3D Crystal Puzzles?
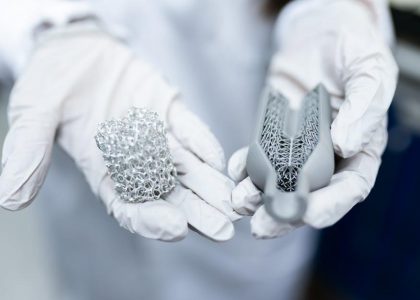
3D Crystal Puzzles are captivating, translucent puzzles constructed from interlocking acrylic pieces, resembling a crystallized sculpture upon completion․ Unlike traditional flat puzzles, these are built volumetrically, demanding spatial reasoning and a methodical approach․

They aren’t simply about fitting pieces together; it’s about understanding how each piece contributes to the overall form․ These puzzles come in a vast array of designs, from iconic characters like Captain Hook and Snoopy to charming scenes like a Carousel or a serene Turtle․
The challenge lies in assembling the pieces in the correct sequence, often without a clear starting point, making them a stimulating mental exercise․ They are a unique blend of art and puzzle, offering a beautiful display piece once finished․
Popular Brands: University Games & BePuzzled
University Games and BePuzzled are the dominant forces in the 3D Crystal Puzzle market, renowned for their diverse range of designs and quality construction․ University Games offers licensed character puzzles, like the 3D Captain Hook, alongside original designs, providing a broad selection for collectors․
BePuzzled, known for its “Original 3D Crystal Puzzle” line, focuses on intricate and challenging puzzles, often featuring animals like the 3D Turtle․ Both brands prioritize accessibility, offering instructions online, often in both English and Chinese, to cater to a global audience․
They both provide customer support for missing pieces – University Games can be reached at infougames․com or (415) 503-1600, ensuring a positive puzzling experience․

Understanding the Puzzle Pieces
Each piece is uniquely shaped and numbered, crucial for following assembly instructions․ Detailed descriptions aid in identifying components, ensuring a smooth, successful build process!
Piece Identification and Numbering
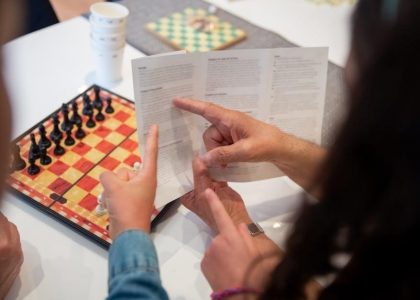
Successfully assembling a 3D Crystal Puzzle hinges on correctly identifying each piece․ Manufacturers, like University Games and BePuzzled, meticulously number each component, often providing detailed diagrams within the instructions․
These numbers aren’t arbitrary; they dictate the precise order of assembly․ Before beginning, carefully separate and examine all pieces, cross-referencing them with the included parts list․ Pay close attention to subtle shape variations, as similar-looking pieces may have distinct numbers․
Understanding this numbering system is paramount․ It transforms a seemingly chaotic collection of plastic fragments into a logical, step-by-step construction project․ Ignoring the numbers will undoubtedly lead to frustration and a potentially incomplete puzzle!
Material Composition: Acrylic Crystal
3D Crystal Puzzles aren’t crafted from genuine crystal, but a high-quality, durable acrylic plastic․ This material is chosen for its clarity, closely mimicking the appearance of crystal while offering greater resilience against breakage during assembly and handling․
Acrylic’s transparency allows light to pass through the completed puzzle, enhancing its visual appeal․ It’s also relatively lightweight, making the finished puzzle easy to display․ The material is designed to withstand repeated assembly and disassembly, though careful handling is always recommended․
This acrylic composition ensures a beautiful, long-lasting puzzle experience, providing a stunning display piece without the fragility associated with actual crystal․

Assembly Instructions ー General Approach
Begin by assembling the foundational pieces to create a stable platform․ Work systematically from the bottom up, following the provided sequence for a successful build!
The “Bottom-Up” Method
The “Bottom-Up” method is universally recommended for assembling 3D Crystal Puzzles․ This approach prioritizes establishing a solid and stable base before progressing to more intricate layers․ Starting with the foundation ensures structural integrity throughout the entire building process․
Carefully identify the base pieces – typically larger and flatter – and connect them according to the instructions․ A firm base prevents collapsing during construction․ As you build upwards, each layer relies on the stability below․
Avoid attempting to force pieces into place; gentle pressure and correct alignment are key․ This methodical technique minimizes frustration and maximizes your chances of a successful, beautiful finished puzzle!
Importance of a Stable Base
A stable base is absolutely critical when tackling 3D Crystal Puzzles․ Without a secure foundation, the entire structure becomes vulnerable to collapse, leading to frustration and potential damage to the delicate acrylic pieces․ Think of it as the cornerstone of your puzzle-building success!
The initial layers dictate the puzzle’s overall integrity․ Ensure each piece in the base is firmly connected before moving upwards․ A wobbly base will amplify instability with each added layer, making completion significantly harder․
Prioritize a level surface and patient assembly of the foundation․ A strong start guarantees a smoother, more enjoyable puzzle-solving experience․
Step-by-Step Assembly Guide
Follow the provided instructions carefully! Begin with the foundation, building upwards layer by layer, referencing the diagram for correct piece placement and order․
Stage 1: Building the Foundation
Establishing a solid base is crucial for successful puzzle assembly․ Begin by carefully selecting the designated foundation pieces, typically the largest and flattest components․
Assemble these pieces, interlocking them precisely as illustrated in the instructions․ Ensure a stable platform; this prevents structural issues later on․ Work from the bottom up, meticulously connecting each piece to its neighbor․
Double-check the connections to guarantee a firm, level foundation․ A wobbly base will compromise the entire structure, making subsequent stages significantly more difficult․ Patience is key during this initial phase!
Refer to the diagram frequently to confirm correct orientation and placement of each foundational element․
Stage 2: Constructing the Core Structure
With a stable foundation established, begin building the core structure of your 3D crystal puzzle․ This stage involves adding layers of pieces that define the puzzle’s primary shape and form․
Carefully select pieces according to the instruction manual, paying close attention to their unique shapes and interlocking features․ Gently press pieces together, ensuring a snug fit without forcing them․
Maintain consistent alignment with the foundation, gradually increasing the puzzle’s height and complexity․ Regularly assess the structure’s stability, making minor adjustments as needed․
This stage requires focused attention to detail and a methodical approach for optimal results․
Stage 3: Adding Intermediate Layers
As the core structure takes shape, transition to adding intermediate layers․ These layers bridge the gap between the foundation and the final top section, refining the puzzle’s overall design and adding intricate details․
Refer closely to the instruction manual, identifying pieces specific to these layers․ Observe how they connect to the existing core, creating a seamless and visually appealing progression․
Gentle pressure is key; avoid forcing pieces, as this could compromise the puzzle’s integrity․ Continuously check for alignment and stability, ensuring each layer contributes to a robust structure․
Patience and precision are vital during this phase, building towards the puzzle’s completion․
Stage 4: Completing the Top Section
With the intermediate layers secure, focus on finalizing the top section of the 3D Crystal Puzzle․ This stage often involves the most delicate and uniquely shaped pieces, demanding careful attention to detail․
Consult the instructions to identify the final pieces and their precise placement․ Gently connect them to the core structure, ensuring a snug and stable fit․ Avoid excessive force, as the acrylic crystal can be sensitive․
As you add the final pieces, the puzzle’s overall form will become fully realized․ Take a moment to admire your progress and ensure all connections are secure before declaring completion!
Enjoy your beautifully assembled 3D Crystal Puzzle!
Troubleshooting Common Issues
Encountering difficulties? Missing pieces can be resolved by contacting University Games at infougames․com or (415) 503-1600 for assistance and replacements․
Stuck pieces require gentle maneuvering – avoid forcing them to prevent damage!
Dealing with Missing Pieces (Contact Information: infougames․com, (415) 503-1600)
Discovering a missing piece can be frustrating, but don’t abandon your puzzle! University Games offers excellent customer support to resolve this issue swiftly․ The first step is to carefully re-examine the packaging and your work area – sometimes pieces are simply misplaced․
If a thorough search proves unsuccessful, contact University Games directly․ You can reach them via email at infougames․com, detailing the puzzle name and the missing piece number (if identifiable)․ Alternatively, a phone call to (415) 503-1600 during business hours will connect you with a representative ready to assist․ Be prepared to provide the puzzle’s product code for faster processing of your request․ They are committed to ensuring a complete and enjoyable puzzling experience!
Addressing Stuck Pieces
Encountering a stuck piece is a common challenge when assembling 3D Crystal Puzzles․ Avoid forcing the piece, as this could lead to breakage! Gently try wiggling the piece back and forth, applying minimal pressure․ Ensure the surrounding pieces are correctly aligned, as misalignment can create resistance․
If the piece remains stubbornly stuck, examine the connection points for any small plastic burrs or imperfections․ A very fine grit sandpaper (used cautiously!) might smooth these out․ Never use excessive force or tools․ Patience is key! Sometimes, taking a short break and returning with a fresh perspective can help you identify the subtle adjustment needed to release the piece․
Specific Puzzle Examples & Instructions
Detailed instructions are available for popular puzzles like Captain Hook, the Carousel, and the Turtle! Video tutorials assist with the Turtle puzzle, simplifying the assembly process․

3D Captain Hook Puzzle Instructions
Embark on a swashbuckling adventure with the 3D Captain Hook Crystal Puzzle! Begin by carefully examining all the pieces, noting their unique shapes and how they interlock․ The foundation requires precise placement of initial components, establishing a stable base for the iconic character․
Work systematically, referencing the provided diagrams or online resources; Pay close attention to the angles and curves, ensuring a snug fit for each piece․ Building “bottom-up” is recommended, gradually adding layers to form Captain Hook’s distinctive silhouette․
Take your time and avoid forcing pieces; gentle pressure is key․ Once assembled, you’ll have a stunning, translucent Captain Hook, a testament to your puzzle-solving skills!
3D Carousel Puzzle Instructions
Step right up to assemble the enchanting 3D Carousel Crystal Puzzle! This deluxe puzzle requires a methodical approach, starting with the carousel’s base․ Identify the foundational pieces and connect them securely, forming a stable platform for the rotating structure․
Build upwards, carefully interlocking the carousel’s tiers and decorative elements․ Pay attention to the alignment of the horses and the central column, ensuring a visually appealing and structurally sound build․ The “bottom-up” method is highly recommended for stability․
Enjoy the mesmerizing result – a beautiful, translucent carousel, a delightful display of your puzzle mastery!
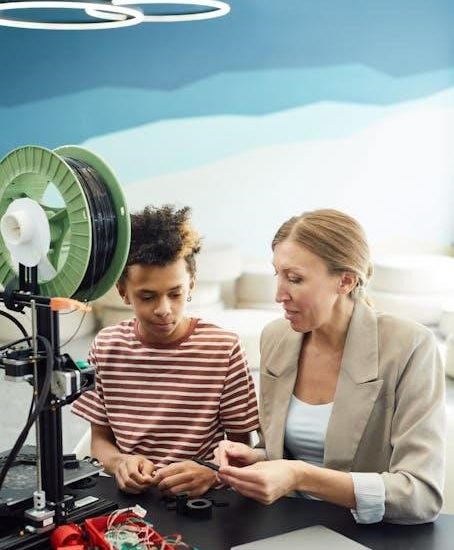
3D Turtle Puzzle Instructions (Video Tutorials)
Dive into the captivating world of the 3D Turtle Crystal Puzzle! For a visual guide, numerous step-by-step video tutorials are readily available online․ These resources demonstrate each piece’s placement, simplifying the assembly process․
Begin by identifying the turtle’s shell components and carefully connecting them to form the main body․ Next, attach the head, legs, and tail, ensuring a secure fit․ The video tutorials highlight crucial connection points and potential challenges․
Follow along with the videos for a smooth and enjoyable building experience, resulting in a charming, translucent turtle!
Snoopy Heart Puzzle Instructions
Assemble the delightful 3D Snoopy Heart Crystal Puzzle by carefully connecting each translucent piece․ Begin with the base, forming the heart’s outline, and gradually build upwards, adding Snoopy’s iconic features․
Pay close attention to the piece shapes and their corresponding positions, referencing the provided diagrams or online resources․ Ensure a snug fit for each component, creating a stable and visually appealing structure․
Don’t lose any puzzle pieces during assembly! With patience and precision, you’ll complete this charming tribute to Snoopy, a perfect gift or collectible display piece․
Accessing Instructions Online
Find detailed instructions for your 3D Crystal Puzzle on the University Games website! Many puzzles offer instructions in both English and Chinese for convenience․
University Games Website ー Instruction Search
Navigating the University Games website is straightforward for finding your puzzle’s instructions․ The site features a dedicated section for game and puzzle instructions, searchable by brand – including University Games, Briarpatch, and more․
To locate instructions for a specific 3D Crystal Puzzle, simply click on the image of your puzzle․ This directs you to the product page where the instructions are readily available․ The website provides a user-friendly experience, ensuring quick access to the guidance you need to successfully assemble your chosen puzzle․
This streamlined approach makes it easy to begin your puzzling journey!
Availability in Multiple Languages (English & Chinese)
Recognizing a global audience, University Games thoughtfully provides puzzle instructions in multiple languages, primarily English and Chinese․ This inclusivity ensures a wider range of customers can enjoy the challenge and satisfaction of assembling these intricate 3D Crystal Puzzles․
Accessibility is key; by offering instructions in both languages, the company removes potential barriers for non-English speakers․ This considerate approach demonstrates a commitment to customer satisfaction and broadens the appeal of their products internationally․
Finding instructions is simple – they are often available directly on the product page!
Puzzle Care and Maintenance
Maintain your puzzle’s brilliance by gently cleaning the acrylic pieces with a soft cloth․ Store completed puzzles carefully to prevent dust and potential damage!
Cleaning the Crystal Pieces
Preserving the clarity of your 3D Crystal Puzzle is essential for showcasing its intricate design․ Dust and fingerprints can diminish the visual appeal, so regular cleaning is recommended․ Use a soft, lint-free cloth – microfiber is ideal – to gently wipe away any surface debris․
Avoid abrasive cleaners or harsh chemicals, as these can scratch or cloud the acrylic crystal․ A slightly damp cloth can be used for stubborn marks, but ensure the pieces are thoroughly dried afterward․ For hard-to-reach areas within the assembled puzzle, a can of compressed air can help dislodge dust particles without causing damage․
Remember, gentle handling and appropriate cleaning methods will keep your puzzle looking pristine for years to come, allowing you to fully appreciate its beauty!
Storage Recommendations
Proper storage safeguards your 3D Crystal Puzzle from dust, damage, and potential loss of pieces․ When disassembled, store the individual components in a resealable plastic bag or container to prevent scattering and keep them organized․ A dedicated puzzle box or storage bin is also a great option․
Avoid storing the puzzle in direct sunlight or extreme temperatures, as this could potentially warp or discolor the acrylic crystal․ A cool, dry place is ideal․ If storing the assembled puzzle, consider a display case or shelf where it’s protected from accidental bumps or falls․
Careful storage ensures your puzzle remains in excellent condition, ready for reassembly or continued display!